Introduction
⚠️ The Cypress Component Testing library is still in Alpha. We are rapidly developing and expect that the API may undergo breaking changes. Contribute to its development by submitting feature requests or issues here.
What is Component Testing?
Definition: Running tests on a component in isolation.
Typically component tests are run using a Node.js testing framework like jest
or mocha. Components we want to test are rendered in a virtualized browser
called jsdom.
With component testing in Cypress, you can achieve the same goal: test a component in isolation. Instead of having components render inside a terminal, Cypress renders components in a real browser. Since the components you are testing are visible in the browser, this makes it easier to test and debug when a test fails.
Component testing in Cypress is similar to end-to-end testing. The notable differences are:
- There's no need to navigate to a URL. You don't need to call
cy.visit()in your test. - Cypress provides a blank canvas where we can
mountcomponents in isolation.
Getting Started
A Cypress Component Test contains a mount function and assertions about the
component it has rendered. A test may interact with component as a user would,
using Cypress API commands like .click(),
.type(), or many more.
With Cypress as the Test Runner and assertions framework, component tests in React and Vue look very similar. Here's an example, written in React:
import { mount } from '@cypress/react' // or @cypress/vue
import TodoList from './components/TodoList'

describe('TodoList', () => {
  it('renders the todo list', () => {
    mount(<TodoList />)
    cy.get('[data-testid=todo-list]').should('exist')
  })

  it('contains the correct number of todos', () => {
    const todos = [
      { text: 'Buy milk', id: 1 },
      { text: 'Learn Component Testing', id: 2 },
    ]

    mount(<TodoList todos={todos} />)

    cy.get('[data-testid=todos]').should('have.length', todos.length)
  })
})
If you are already familiar with Cypress, you'll notice it is almost exactly the same as a Cypress end-to-end testing - all your existing Cypress knowledge and experience is transferrable.
Project Setup
Let's go through the setup to start testing components. You can set it up with an existing React or Vue project, or start a new project from scratch. This guide assumes your project uses a Webpack based tool chain. For our experimental Vite based instructions, please see the information here.
If you currently do not use Webpack, you can create a separate configuration for Webpack specifically for Cypress Component Testing. Follow the Webpack getting started guide to create a new Webpack config, then continue following the Installation guide below.
Prerequisites
- A project with a
package.jsonfile at the root that runs on Webpack 4 or 5. - A
webpack.config.jsfile, or a way to access Webpack configuration. Refer to your framework's documentation. - Some components that you want to test that visually display in a browser. It could be a date picker, tabs, responsive images.
- A basic knowledge of how to write tests in Cypress. (See the Getting Started guide.)
⚠️ Existing end-to-end users
If you are using Cypress Component Testing in a project that also has tests written with the Cypress End-to-End test runner, you may want to configure some Component Testing specific defaults.
You can configure or override Component Testing defaults in your
configuration file (cypress.json by
default) using the component key.
For example, if you would like to use a different viewport size or target
different test files for Component Testing, your cypress.json might look like
this:
{
  "testFiles": "cypress/integration/*.spec.js",
  "component": {
    "componentFolder": "src",
    "testFiles": ".*/__tests__/.*spec.tsx",
    "viewportHeight": 500,
    "viewportWidth": 700
  }
}
The Component Testing runner will use all the configuration at the root level of your configuration file and apply any Component Testing specific overrides.
Install
If you are using Vue.js, click on the Vue tab of the code examples in our documentation when available. If there is no Vue tab, the code is the same.
Start by running the command below to install dependencies. It will install both the latest version of Cypress and the tooling you need to run component testing.
npm install --save-dev cypress @cypress/react @cypress/webpack-dev-server webpack-dev-server
npm install --save-dev cypress @cypress/vue @cypress/webpack-dev-server webpack-dev-server
If it's your first time using Cypress, check out the main Getting Started documentation.
Once installed, you need to configure how Cypress will locate component spec
files. In the following configuration file (cypress.json by default), all
components test files contained within the src directory and match the glob
given in the testFiles key.
{
  "component": {
    "componentFolder": "src",
    "testFiles": "**/*spec.{js,jsx,ts,tsx}"
  }
}
You will also need to configure the component testing framework of your choice
by installing the corresponding component testing plugin. Read more about
Cypress plugins in our plugins guide. For
example, if you are using Create React App, you will need to use the
react-scripts plugin as shown below in your cypress/plugins/index.js file.
// cypress/plugins/index.js

module.exports = (on, config) => {
  if (config.testingType === 'component') {
    require('@cypress/react/plugins/react-scripts')(on, config)
  }

  return config
}
// cypress/plugins/index.js

module.exports = (on, config) => {
  if (config.testingType === 'component') {
    const { startDevServer } = require('@cypress/webpack-dev-server')

    // Vue's Webpack configuration
    const webpackConfig = require('@vue/cli-service/webpack.config.js')

    on('dev-server:start', (options) =>
      startDevServer({ options, webpackConfig })
    )
  }
}
// cypress/plugins/index.js

module.exports = (on, config) => {
  if (config.testingType === 'component') {
    const { startDevServer } = require('@cypress/webpack-dev-server')

    // Your project's Webpack configuration
    const webpackConfig = require('../../webpack.config.js')

    on('dev-server:start', (options) =>
      startDevServer({ options, webpackConfig })
    )
  }
}
Note we have a conditional check against config.testingType. This is useful if
your project is already using existing plugins for the End-to-end runner, and
you don't want them to conflict.
If you have a different React development environment from Create React App, such as Next.js, or use a Vue template other than vue-cli, you will need to import the appropriate plugin. See a list of officially maintained plugins here. Each of these plugins perform the same tasks under the hood. Alternatively, if you have your own Webpack configuration, you can just provide it (without need for a specific plugin) as specified above.
If you have separate Webpack configurations for development and production, use the development configuration. It will give better location information using SourceMaps.
Writing Component Tests
This example assumes a project with a <Button /> component.
We recommend locating your component tests next to the components you are
testing. If you are using our recommended testFiles glob
(**/*spec.{js,jsx,ts,tsx}) as described above:
- Navigate to where this component exists in your code.
- Create a spec file in the same folder called
Button.spec.jsx.
Otherwise create Button.spec.jsx in the relevant directory based on your
configuration.
Once the test file exists, we can begin to write a test called
Button.spec.jsx:
import * as React from 'react'
import { mount } from '@cypress/react'
import Button from './Button'

it('Button', () => {
  mount(<Button>Test button</Button>)
  cy.get('button').contains('Test button').click()
})
import { mount } from '@cypress/vue'
import Button from './Button'

it('Button', () => {
  // with JSX
  mount(() => <Button>Test button</Button>)

  // ... or ...
  mount(Button, {
    slots: {
      default: 'Test button',
    },
  })

  cy.get('button').contains('Test button').click()
})
The React and Vue tests are nearly identical, allowing for a common shared test style across frameworks!
- Open Cypress in Component Testing mode:
npx cypress open-ct
- Select the spec file in the sidebar. You should see the following:
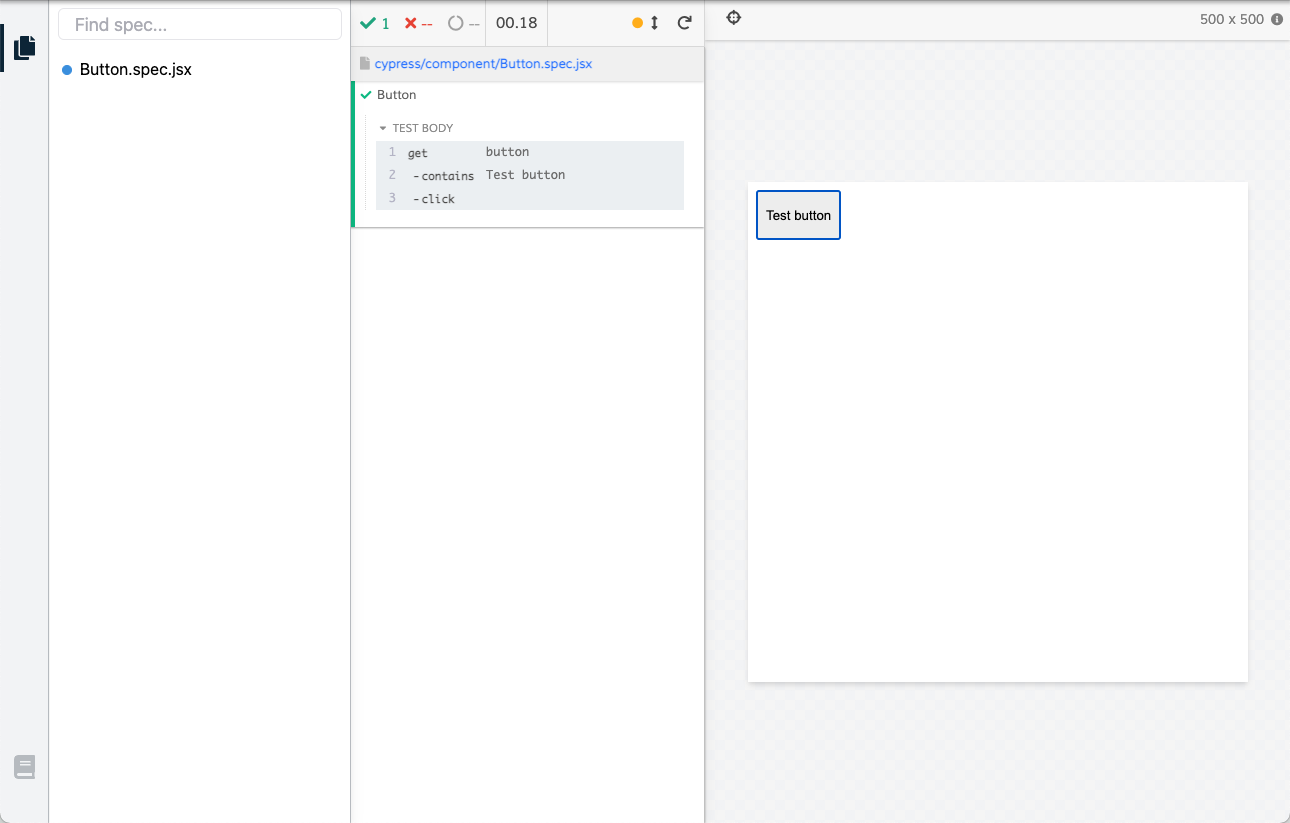
- Try to modify the test in your editor, make the test fail, etc. The tests will re-run instantly with immediate visual feedback.
Set up CI
Sometimes we want to run tests without interactivity and see all results in the terminal, like when we run our tests in continuous integration.
To run all component tests in the terminal, run the command below:
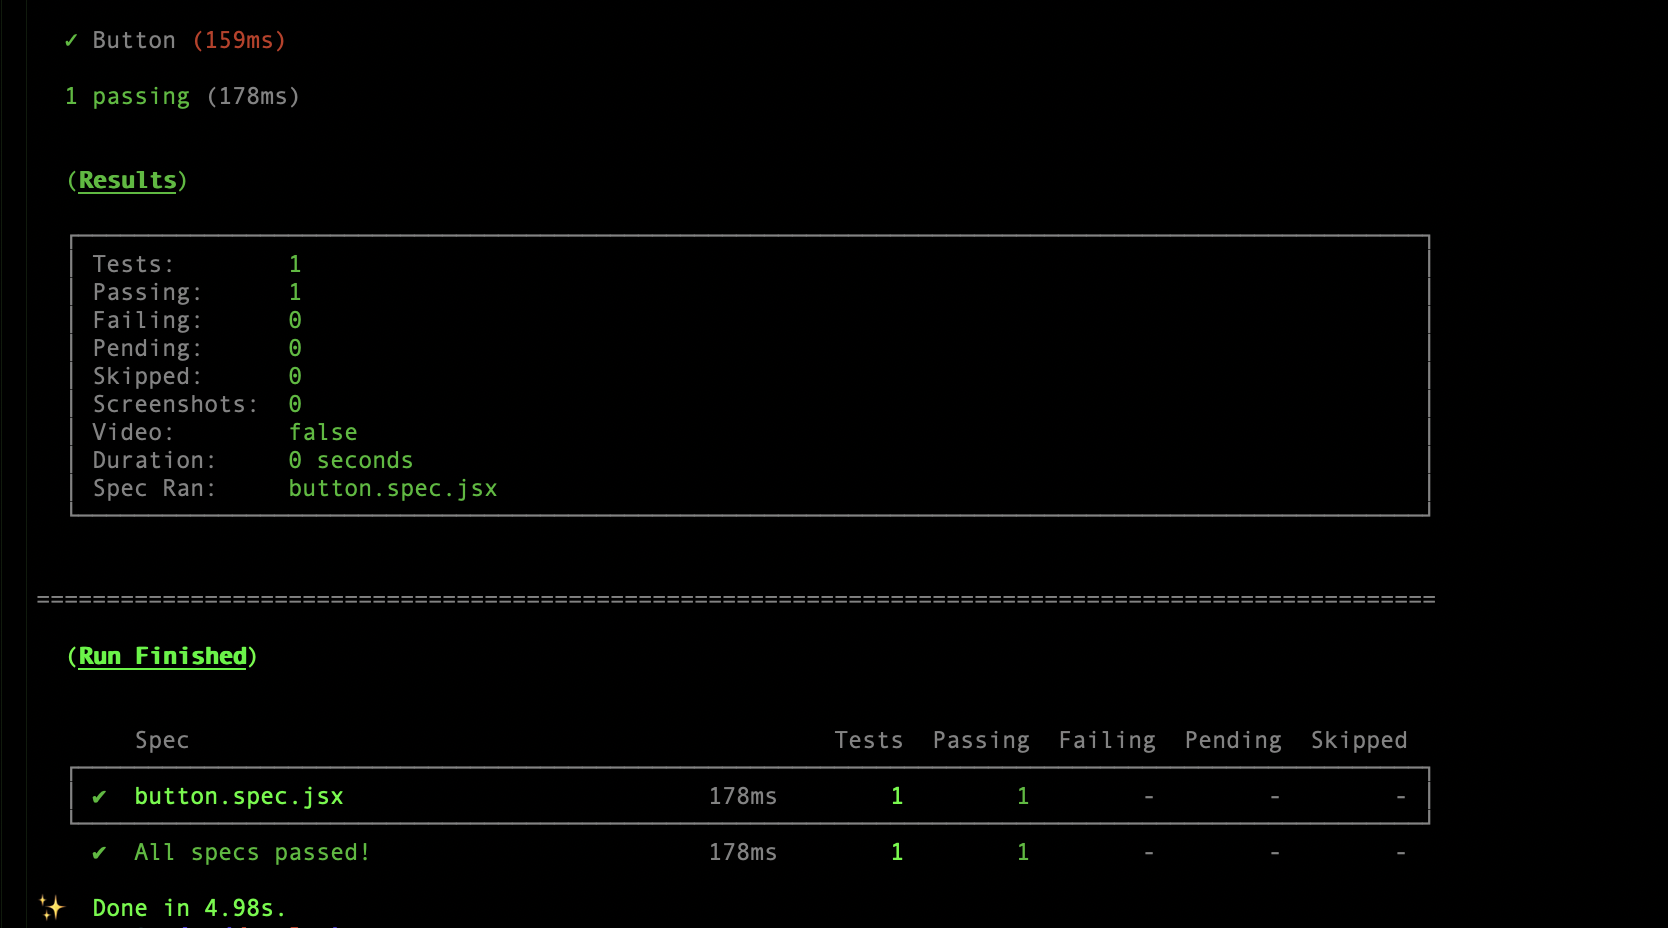
npx cypress run-ct
In the project we just built, this command will show the following results.
To make the component tests part of your
continuous integration pipeline,
add a script to run npx cypress run-ct to your CI configuration.
For example, see the repo cypress-react-component-example that uses Cypress GitHub Action to first run the E2E tests, then run the component tests.
Experimental
The tools listed in this section are actively being developed. We will support early adoption of these projects in order to get community feedback. Please report issues against these projects in Github or contact us on Discord for additional support.
Vite
For a quick-start, please take a look at the boilerplate repositories below. To setup a project from scratch please check out the below plugins file.
From Boilerplate
- Vite + Vue 3 (VueConfUS 2021 by Jessica Sachs)
From Scratch
To get started with Vite, please follow the installation instructions for
Webpack, but replace @cypress/webpack-dev-server with
@cypress/vite-dev-server. Here is a sample plugins.js file where the
dev-server:start event is registered with Vite.
import { startDevServer } from '@cypress/vite-dev-server'

export default function (on, config) {
  on('dev-server:start', (options) => {
    const viteConfig = {
      // import or inline your vite configuration from vite.config.js
    }
    return startDevServer({ options, viteConfig })
  })
}
Exactly like Webpack, you should start Cypress with yarn cypress open-ct.
Writing component tests when using Vite is exactly the same as when using
Webpack. Minor differences may occur depending on the
Known issues
- Missing Vitesse support
- May flake in resource-constrained CI machines
- Issues with certain PWA plugins
Debugging Strategies
Issues will often arise during the initial compilation and start of your
project. Please collect logs and focus on stripping down your viteConfig to
work around any issues. Please log any issues in Github.
Collecting logs
To debug any Vite issues, run Cypress using
DEBUG=cypress:* yarn cypress open-ct.
Compiling your project
Remove all plugins and pass in an empty viteConfig into the startDevServer
options. Add plugins in one-at-a-time